What are Post Types?
A post type allows WordPress to store content in a more organized way. Data from these post types can then be displayed, they are actually stored in the same manner as all posts. For instance: did you know pages in WordPress are actually stored as posts, but with a “Page” post type? Under the hood, pages use the WordPress posts system, and when you click on “Pages” in the WordPress dashboard, it simply shows you all posts with the post type of “Page”. Most major plugins handle their data in a similar manner. WooCommerce products are posts with a custom post type. Modern Tribe’s Events Calendar uses custom post types for its events. It’s the WordPress way!
Why Create a Custom Post Type?
A custom Post Type will let you store and display data in a more organized way. If you need a clear separation of data, where you are reusing the same format many times, a custom Post Type may be an ideal solution for you.
Many themes ship with custom Post Types built-in. For example, there is a trend in themes geared toward making a website for attorneys adding in the ability to enter and display attorney information into a custom-built “Attorney” Post Type. Details often include name, qualifications, contact information, and description. With a custom Post Type, we have a list of all of the data in one place, and we know they all use the same data format. This allows us to easily display the information on the site. WordPress also features a way to list all posts of a given post type. From this provided example of attorneys, there will be an attorney Archive page which lets the user see all Attorneys on a single page – without any additional fuss. If the data is entered in the WordPress dashboard, it’ll automatically be displayed on the archive page.
Creating a Custom Post Type
We’re about to dive into code to show how you can add custom post type functionality to your website.
First, you should decide if you want to build custom post type functionality into a theme or plugin. If you are a theme developer with one theme, it might make sense to build a post type inside your theme (that’s what we’ll be doing in our example). If you are adding functionality to a client’s website, or you are a theme developer with many themes, adding additional post types is better suited to a plugin. This ensures that regardless of what theme a user has activated, the custom post type functionality will still work. Also as a theme developer, this can save you from duplicating your code across many themes.
Registering a Custom Post Type
We’ll create our custom post type functionality inside of our child theme, because it is quicker to implement the code and templates.
Let’s build a system to add “Sales Associates” to our website. Each associate will have a name, phone number, e-mail address, and short biography.
Add the following code to functions.php.
function create_custom_post_type() {
register_post_type( ‘associate’,
array(
‘labels’ => array(
‘name’ => __( ‘Associates’ ),
‘singular_name’ => __( ‘Associate’ )
),
‘public’ => true,
‘has_archive’ => true,
)
);
}
add_action( ‘init’, ‘create_custom_post_type’ );
The first parameter passed to “register_post_type” is the unique identifier for this custom post type (the slug, which will appear in URLs, for instance). “Name” is text that will show up in the WordPress dashboard menu. Since “Sales Associate” may be too long, I’ve shortened it. “Singular_name” is the same name, but singular instead of plural. This is used in WordPress dashboard.
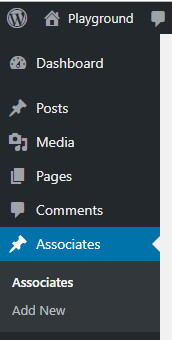
After saving the code, go to your WordPress dashboard. You’ll see we now have an “Associates” menu option.
We need to perform an additional step to get the archive page for this new post type working. From the WordPress dashboard, go to “Settings → Permalinks”. Select an option (we recommend “Post name”) and then save changes.
We’ll take the post title for the Associate’s name, and the content editor for the biography. That means we still need to add an additional custom meta field that can be edited from the WordPress dashboard and displayed on a page.
Adding Editable Fields
Let’s return to functions.php.
First, we need to create an expandable container that will house our editable fields.
Add the following code:
function add_cpt_meta_box() {
add_meta_box(
‘associate_meta_box’,
‘Associate Data’,
‘show_cpt_meta_box’,
‘associate’,
‘normal’,
‘high’
);
}
add_action( ‘add_meta_boxes’, ‘add_cpt_meta_box’ );
function show_cpt_meta_box() {}
“associate_meta_box” is a unique ID for this expandable box.
“Associate Data” is the title of this box as seen in the post editor.
“show_cpt_meta_box” is the function callback for displaying the fields within this meta box.
“associate” is the custom post type slug for which pages this meta box will be visible on
“normal” this is the context, which is where on the screen this box will be rendered.
“high” this is the priority, which determines the order in which meta boxes are shown on the screen.
For further details, check out the “add_meta_box” API call on WordPress.org.
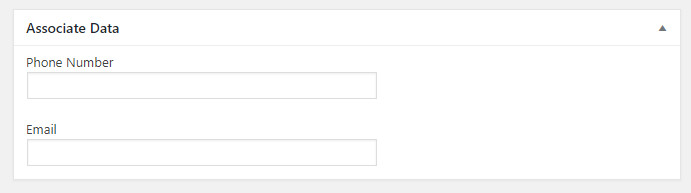
Now when you go back and edit an “Associates” post, you’ll see your new “Associate data” drop down. It’s empty, but we’ll fix that.
Let’s revisit our show_cpt_meta_box function and display some fields.
function show_cpt_meta_box() {
global $post;$meta_fields = get_post_meta( $post->ID, ‘associate_fields’, true );
$phone = “”;
$email = “”;if(isset($meta_fields[‘phone’]) && !empty($meta_fields[‘phone’])) {
$phone = $meta_fields[‘phone’];
}if(isset($meta_fields[’email’]) && !empty($meta_fields[’email’])) {
$email = $meta_fields[’email’];
}?>
<input type=”hidden” name=”associate_nonce” value=”<?= wp_create_nonce( basename(__FILE__) ); ?>”>
<label for=”meta_fields[phone]”>Phone Number</label>
<br>
<input type=”text” name=”meta_fields[phone]” id=”meta_fields[phone]” class=”regular-text” value=”<?= $phone ?>”><br><br>
<label for=”meta_fields[email]”>Email</label>
<br>
<input type=”text” name=”meta_fields[email]” id=”meta_fields[email]” class=”regular-text” value=”<?= $email ?>”><?php
}
This will add our new “phone” and “email” textboxes to the post editor. Let’s take a look.
These fields don’t do anything yet however. Let’s add the functionality in functions.php to save our post’s meta data.
function save_cpt_meta($id) {
if ( !wp_verify_nonce( $_POST[‘associate_nonce’], basename(__FILE__) ) ) {
return $id;
}if ( defined( ‘DOING_AUTOSAVE’ ) && DOING_AUTOSAVE ) {
return $id;
}if (‘associate’ === $_POST[‘post_type’]) {
if ( !current_user_can( ‘edit_post’, $id ) ) {
return $id;
}
}if(!empty($_POST[‘meta_fields’])) {
update_post_meta( $id, ‘associate_fields’, $_POST[‘meta_fields’] );
}
}
add_action( ‘save_post’, ‘save_cpt_meta’ );
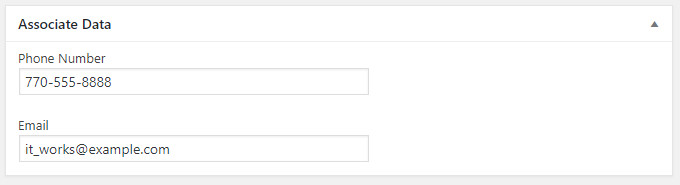
Now, let’s go back to an Associate post, enter some data for our two fields, and click update. When the page reloads, our fields should be automatically populated with our saved data.
Displaying Data
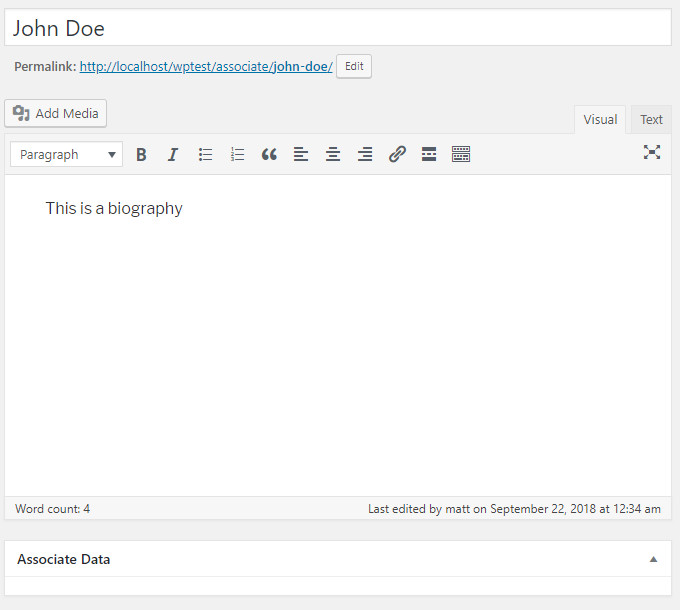
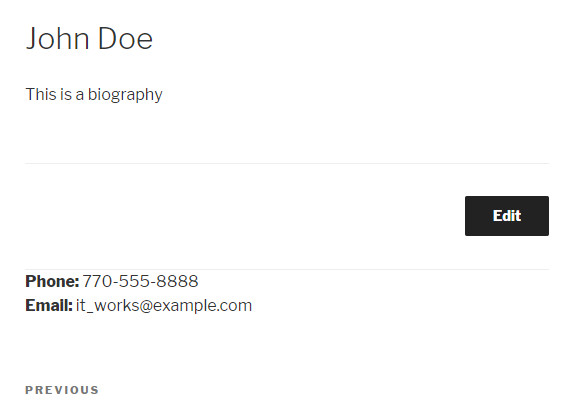
Like any other post, our custom “Associate” post type will generate a public URL when the post is published. In my case, this URL is http://localhost/wptest/associate/john-doe/
You’ll notice, however, that if you visit this URL it does not show any of the meta data (the phone number or the email address). This is because it is using the default WordPress post template to output this page. We’ll need to create a customized version and display our meta data.
WordPress outputs posts in the template file single.php. Find this file in your theme directory and duplicate it. If you have a child theme, move the file there. Now rename our duplicated single.php to single-associate.php. WordPress uses the naming convention single-slug.php to override the output based on the post type.
Now, crack open single-associate.php. We’ll add some lines after get_template_part to output our meta data. This file is on the larger side, so I’m not pasting the whole file. We are using the Twenty Seventeen theme. The only important part is to output your meta data inside of the loop.
$fields = get_post_meta( $post->ID, ‘associate_fields’, true );
echo “<strong>Phone: </strong>” . $fields[“phone”];
echo “<br><strong>Email: </strong>” .$fields[“email”];
If all went well, you should now see this extra meta data output onto your post.
And because this output page is specific for this post type, if we view any other post (such as our default Hello World post), we shouldn’t see any of this output
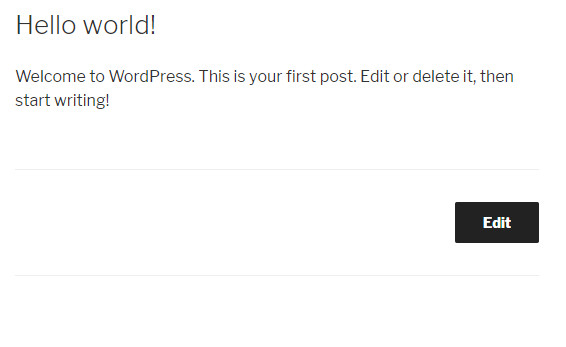
Perfect!
Conclusion
Custom post types help you wrangle your data into reusable pattern that can then be easily edited and easily displayed on various parts of the site. However, it takes a good deal of initial time investment to setup the system. Likewise, you would probably have much more complicated template files than the examples provided in this post to truly make the data feel at home.
[ccc_inline_callout title=”Need to organize your site’s data?” content=” Let us build a custom post type solution for you!”]

Chris LaFay